Here's something new and different for the PlumWater Cottage blog...a tutorial! I think the last tutorial I documented was back in the summer of 2008 when I showed you how to make a dress form, using my daughter as a guinea pig. That was fun...this is much easier.
It's easy to make a little travel journal using postcards(cut paper twice the length of the postcard), or, as I've seen on Pinterest, you can bind postcards into a booklet. Send postcards home from all of your travels, and when you get back, voila!, a nice little memory book. It's all done using the same process.


Here's what you'll need:
Materials:
· Notecard, cut in half, trimmed to 4” x 5.5”
· Copy paper, trimmed to 8” x 11”. Sub-cut this paper to 4” x 11”
· Ruler
· Pencil
· Awl or Screw punch
· Waxed linen thread
· Needle

Select note card. Cut
in half along the fold-line. Measure,
and cut the card(s) 4” x 5 ½”.


Cut copy paper (regularly 8 ½” x 11”) to 8” x 11”. Cut this paper down the middle to create two
long strips 4” x 11”. Cut 8 full sheets,
making 16 strips.

Fold each sheet in half (they are now 4” x 5 ½”) and crease
the fold.

After all sheets are folded and creased, put them together
with the folded edge to the right. We
will be binding the journal through the cut edges, then open up the folds for a
nicely finished edge.

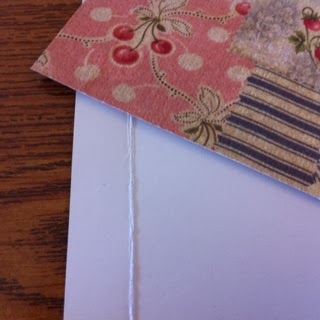


Using an awl or screw punch, make a hole through the cover
and the pages beneath. Make sure you go
all the way through the book block and come out through the back cover.
The journal is now ready to bind.


No comments:
Post a Comment